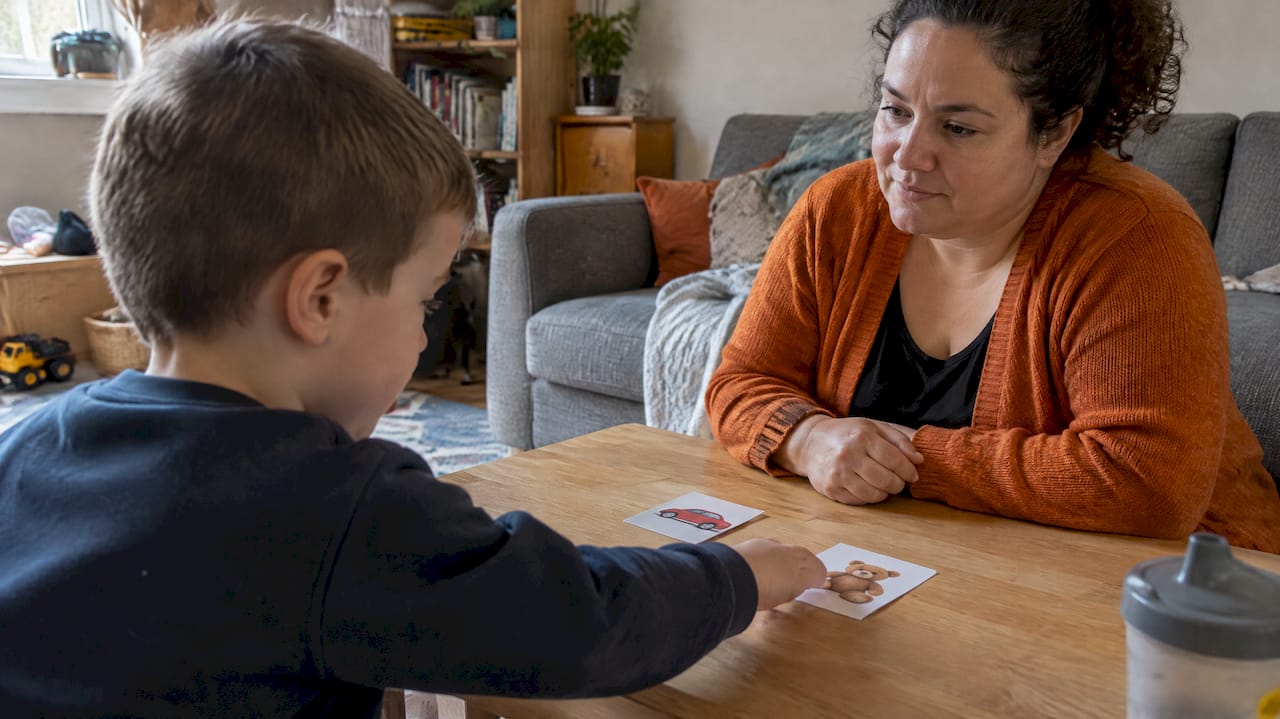
Visual schedules reduce transition anxiety and increase independent task completion by giving a child with autism a persistent, readable plan of what comes next. A 2024 literature review of 10 studies found positive effects on academic-related on-task behaviors, with stronger results when schedules were paired with prompting and reinforcement. Organizations like AFIRM, the Vanderbilt Kennedy Center, and Autism Victory App all point to visual schedules as one of the most accessible tools families can start using today.
You don’t need a perfect system on day one. Here are three things you can do in the next 30 minutes:
Take two photos on your phone: one of a less-preferred activity (washing hands) and one of a preferred one (a snack). Tape them side by side. That’s a First–Then board.
Write or draw a 3-step morning sequence (wake up → get dressed → eat breakfast) on an index card and post it at eye level.
Pick one routine your child already does and commit to using the visual for it every single day this week.
That’s it. One routine. Three pictures. One week. The research and the practical steps below will help you build from there.
What is a visual schedule, exactly?
A visual schedule is a physical or digital display that shows a child what activities will happen, in what order, using images, objects, words, or a combination. The Nebraska Autism Spectrum Disorders Network describes them as an environmental support that takes the abstract concept of time and presents it in a concrete, manageable form. They serve two core purposes: providing motivation by making preferred activities visible and predictable, and helping children understand the sequence of events so they can anticipate change rather than be blindsided by it.
Five core components shape every effective schedule:
Form of representation: Objects (a toy cup for snack time), photographs, picture icons, written words, or a hybrid mix
Length: How many steps are shown at once (2 for beginners, up to a full day for older children)
Manipulation method: Whether the child physically interacts with the schedule (flipping a card, removing a Velcro piece) or simply views it
Location: Where the schedule lives (on the wall, in a binder, on a tablet)
Transition initiation: Who prompts the child to check the schedule and when
Common formats include the First–Then board (two-step, immediate transitions), a 3–5 step sequence strip (a morning or snack routine), a full-day strip (school-age children), and activity-based step cards (breaking one task like “getting dressed” into sub-steps). First–Then works best for introducing the concept. Sequence strips suit children who are ready for a short chain of tasks. Full-day formats fit children who already understand the schedule concept and need broader predictability.
Why visual schedules help children with autism
Many autistic children are stronger visual processors than auditory ones. Spoken instructions disappear the moment they’re said. A visual stays on the wall, available for repeated reference, giving the child time to process at their own pace. That single difference explains a lot of the anxiety reduction families notice once a schedule is in place.
Research note: A 2024 literature review covering 10 studies found that visual schedules consistently improved academic-related on-task behaviors. Six of those studies were rated “strong” by evaluation standards, and outcomes were best when schedules were combined with prompting and reinforcement.
Practical benefits parents and teachers report:
Reduced transition anxiety. A scoping review found that visual supports increase predictability and reduce anxiety across home and community settings.
More independent task completion. Children learn to check the schedule themselves rather than waiting for an adult to tell them what’s next.
Fewer verbal prompts needed. Over time, the schedule replaces repeated verbal reminders.
Better compliance with less-preferred tasks. The First–Then board makes the work-to-reward relationship visible and concrete, which increases follow-through on difficult tasks.
Freed cognitive resources. When a child knows what’s coming, they spend less mental energy on worry and more on learning and social engagement.
Which format fits your child’s needs?
Choosing the right format comes down to four axes: representation level, portability, interaction style, and technology preference.
Format type | Best for | Key advantage | Watch out for |
|---|---|---|---|
Object-based | Pre-verbal toddlers, tactile learners | Concrete, sensory-rich | Harder to transport |
Photo-based | Emerging communicators | Personalized, familiar | Photos can become outdated |
Picture icons | Early readers, school settings | Consistent, easy to reproduce | Generic icons may confuse some children |
Written words | Older children, adolescents | Fast to update, independent | Requires reading ability |
Digital app | Adolescents, portable needs | Reminders, media, portability | Screen dependency risk |
Use this when guidance:
Pre-verbal or toddler: Start with real objects (a spoon for lunch, a towel for bath time). Pair each object with a photo over time.
Emerging communicator: Use photos of your child’s actual environment, not stock images. Personalization matters more than polish.
Early reader: Combine a picture icon with a short printed word beneath it.
Adolescent or independent learner: Written lists or a simple digital checklist on a tablet work well and look age-appropriate.
Low-tech options (laminated photos, Velcro strips, pocket folders) are often as effective as digital systems. Practice guides consistently recommend starting with simple, personalized visuals over complex apps, especially in the early stages. Digital tools earn their place when portability matters (community outings, multiple classrooms) or when a child is already comfortable with a tablet. The risk with apps is over-relying on device availability. A laminated card never runs out of battery.
One caution worth repeating: avoid off-the-shelf templates that don’t reflect your child’s actual routine and transition points. Structure matters as much as the images. A schedule that doesn’t match real life creates confusion, not predictability.
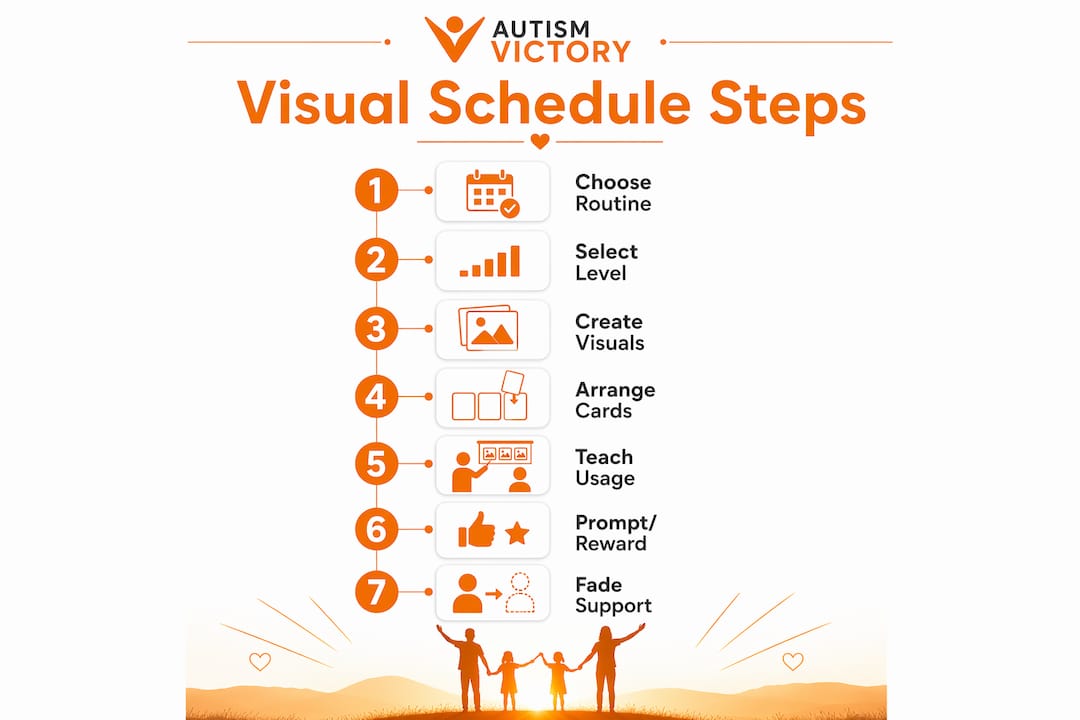
How to build a visual schedule in seven steps
Step 1: Pick one motivating routine
Start with a routine your child already partially does and that ends with something they enjoy. Snack time, a favorite game, or a short play sequence all work well. Do not start with a full-day schedule.
Step 2: Choose your representation level
Match the format to your child’s current communication level (see the table above). When in doubt, use photos of your child’s actual environment.
Step 3: Create the visuals
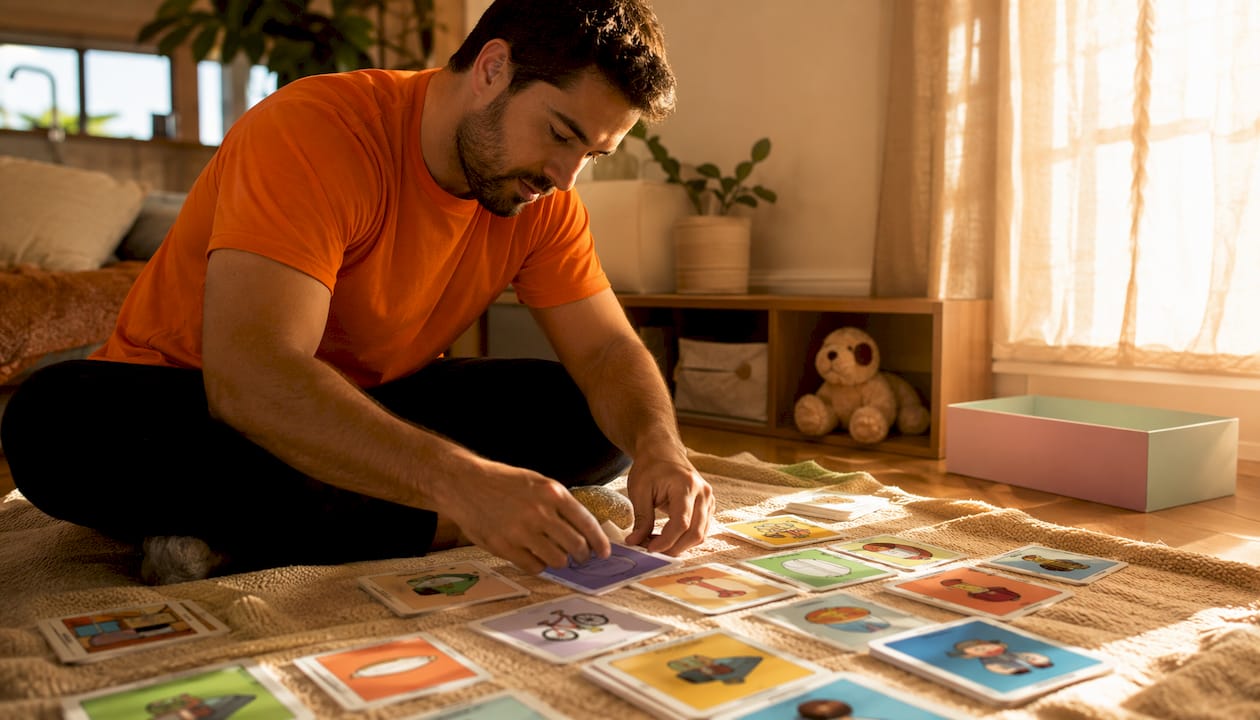
Take photos, print icons, or write words on index cards. Laminate them or cover with clear tape. Keep images simple, high-contrast, and free of visual clutter.

Step 4: Arrange the schedule and add a “finished” system
Place cards in left-to-right or top-to-bottom order. Add a “finished” pocket, envelope, or box where completed cards go. This physical action of moving a card is not just organizational. Flipping a card or removing a Velcro piece gives the child a sensory “done” signal that helps internalize task completion.
Step 5: Teach the child to use it
Walk through the schedule together before the routine starts. Point to the first card, complete the step, then guide the child to move the card to the “finished” spot. Repeat this every time, without skipping steps.
Step 6: Prompt and reinforce
Use a physical gesture (point to the schedule) rather than a verbal reminder. Pair completion with praise or a small reward, especially in the early weeks. Combining visual schedules with prompting and reinforcement produces stronger outcomes than using the schedule alone.
Step 7: Fade prompts and expand
Once the child checks the schedule independently for 3–5 consecutive days, reduce your physical prompts. Then add one more step to the sequence. Expand to a second routine only after the first is solid.
Pro Tip: When a child gets stuck, redirect them to the schedule rather than repeating verbal instructions. Point to the card and wait. Over time, this reduces dependency on adult narration and builds genuine independence.
Using visual schedules at home and at school
The core system is the same in both settings, but the context differs enough to plan for it deliberately.
At home:
You control the environment, so consistency is easier to maintain.
Use the schedule for high-friction routines first (morning, bedtime, homework).
Keep the schedule in a fixed, visible location the child can access independently.
Track which steps still need a prompt and which are now independent.
At school:
Coordinate with the teacher and any paraprofessionals so everyone uses the same prompting language and the same “finished” system.
Include the visual schedule as an accommodation in the child’s IEP or 504 plan. This ensures it travels with the child across classrooms and grade levels.
Ask the teacher to share a weekly data note: how many prompts were needed, which transitions were smooth, which were not.
Tracking progress (simple version):
Record the number of steps completed independently each day.
Note how many prompts were needed (verbal, gestural, physical).
After two weeks, look for a downward trend in prompts. That’s your signal the schedule is working.
If the schedule is used at school but not at home (or vice versa), generalization suffers. Consistency across settings is one of the strongest predictors of long-term success.
Adapting schedules for different ages and abilities
There is no single schedule design that fits every child. Age and communication level should drive every formatting decision.
Toddlers and pre-verbal children: Use real objects first. A small cup means snack; a washcloth means bath. Pair objects with photos over several weeks, then fade the objects once photos are understood.
Preschool and emerging communicators: Photographs of the child’s own home and classroom work better than generic clip art. Keep sequences to 3 steps maximum at first.
Early readers (ages 5–8): Picture-word hybrids build reading skills alongside schedule use. One icon plus one printed word per card.
Elementary students: A full-day strip with 6–8 cards is manageable. Add a portable mini-schedule (a small binder or card ring) for transitions between classrooms.
Adolescents: Written checklists or a simple digital format respects their age and supports independence. Involve them in choosing the format and the icons or words used.
Involving the child in creating the schedule increases buy-in at every age. Let a preschooler pick which photo to use for “play.” Let a teenager choose whether to use a phone app or a paper checklist. When the child has a hand in building it, they’re more likely to use it.
For children with sensory sensitivities, keep the schedule in a low-stimulation area, use matte lamination to reduce glare, and avoid schedules with too many colors or small images. Short sequences with built-in sensory breaks (a picture of headphones or a squeeze toy) can be added as steps in the chain.
What to do when the schedule isn’t working
Most problems with visual schedules fall into a few predictable categories. Here’s how to diagnose and fix them.
Child ignores the schedule entirely:
The routine may not be motivating enough. Switch to a routine that ends with a preferred activity.
The schedule may be too long. Cut it to 2–3 steps and rebuild from there.
Child waits for an adult to narrate each step:
You may be over-prompting verbally. Shift to pointing only, then fade to a head nod, then nothing.
Redirect to the schedule consistently. Every time you answer “what’s next?” verbally, you delay independence.
Child resists changes to the schedule:
Introduce a “surprise” or “change” card (a question mark or a star) and practice using it during low-stress moments. Gradually add it to real schedule changes.
Keep changes predictable by announcing them the night before when possible.
Child becomes dependent on the schedule but won’t generalize to new settings:
Build a portable version (a small card ring or a phone photo album) and use it in community settings from early on.
Involve the child’s speech-language pathologist (SLP) or Board Certified Behavior Analyst (BCBA) if generalization fails after consistent trials across multiple settings.
Dos and don’ts:
Do start with a single short routine of 3–5 steps before expanding.
Do fade prompts deliberately and track when you do it.
Don’t use a generic template without adapting it to your child’s actual routine.
Don’t add more steps until the current sequence is independent.
Don’t skip the “finished” action. It matters more than it looks.
If a schedule has been used consistently for four weeks with no improvement, consult a BCBA, SLP, or special educator. The issue may be the teaching method, not the tool. Transition-related meltdowns that persist despite a schedule in place often signal a need for a behavior support plan alongside the visual system.
Sample schedules, templates, and materials
Three ready-to-adapt formats to get you started today:
A. First–Then board (immediate transitions) Two cards side by side: “First: wash hands” (photo of sink) → “Then: snack” (photo of favorite food). Use this for any single transition that causes resistance.
B. 3–5 step morning routine (moveable pieces) Cards on a Velcro strip: Wake up → Get dressed → Eat breakfast → Brush teeth → Get backpack. Child moves each card to a “done” pocket after completing the step.
C. Full-day school strip (portable card set) A small binder ring with 6–8 cards covering the school day: Arrival → Circle time → Centers → Snack → Recess → Lunch → Specials → Dismissal. The child carries it and checks off each card.
Low-tech materials checklist:
Camera or smartphone (for photos)
Color printer
Laminator or clear packing tape
Velcro dots (hook-and-loop)
Pocket folders or a small binder
Index cards or cardstock
A “finished” container (envelope, small box, or pocket)
Digital tool checklist (if using an app):
Supports photo uploads from your own camera roll
Includes audio or video prompts
Allows custom sequencing
Works offline
Has a simple, low-clutter interface
Keep icons large (at least 2 inches square for young children) and use high-contrast images. Avoid busy backgrounds in photos.
What the research actually shows
The evidence base for visual schedules is solid, though not without limits.
Key finding: A 2024 literature review of 10 studies found that visual schedules improved academic-related on-task behaviors across participants with autism. Six studies were rated “strong” by evaluation criteria. Seven of the 10 reported social validity data, six programmed for generalization, and four reported maintenance effects.
Research dimension | Finding |
|---|---|
Studies reviewed | 10 |
Studies rated “strong” | 6 |
Reported social validity | 7 of 10 |
Programmed for generalization | 6 of 10 |
Reported maintenance effects | 4 of 10 |
Best outcomes | VS + prompting + reinforcement combined |
Visual supports are classified as an evidence-based practice(EBP) by AFIRM for learners ages 0–22 on the autism spectrum. That classification is based on a body of research, not a single study.
Practical implications:
Expect improvement in on-task behavior and transition compliance, not necessarily in social skills or communication directly.
Visual schedules alone may be insufficient for some outcomes. Pair them with explicit prompting and a reinforcement plan.
Generalization (using the schedule in new settings) and maintenance (continuing to use it over time) require deliberate planning. Don’t assume skills transfer automatically.
What to track:
Number of steps completed independently per session
Number of prompts needed (verbal, gestural, physical)
Time on task before and after introducing the schedule
Frequency of transition-related refusals or meltdowns
Review your data every two weeks. If prompts are not decreasing, change the teaching method before changing the schedule format.
Key Takeaways
Visual schedules reduce transition anxiety and increase independence when matched to a child’s communication level, taught explicitly, and paired with consistent prompting and reinforcement.
Point | Details |
|---|---|
Start with one routine | Begin with a 3–5 step motivating sequence before building a full-day schedule. |
Match format to the child | Use objects for pre-verbal learners, photos for emerging communicators, words or digital for older children. |
Teach the schedule explicitly | Walk through each step together, prompt physically (not verbally), and reinforce completion. |
Fade prompts deliberately | Track prompts daily; reduce them once the child checks the schedule independently for 3–5 days in a row. |
Autism Victory App | Provides step-by-step video guidance, printable templates, and a caregiver community to support every stage of building and using visual schedules. |
The part most guides skip
There’s a version of visual schedule advice that makes the whole thing sound like an afternoon craft project. Print some cards, add Velcro, done. What that version leaves out is the teaching. The schedule is not the intervention. How you teach the child to use it is the intervention.
Most families who tell me “we tried visual schedules and they didn’t work” were using the schedule as a display, not as a teaching tool. They pointed to it occasionally. They reminded the child verbally when the schedule was right there. They never faded their own prompts because fading felt risky. And then, six weeks in, the child was still waiting for an adult to narrate every step.
The research is clear on this: combining visual schedules with prompting and reinforcement produces better outcomes than the schedule alone. That’s not a footnote. That’s the whole point. The visual is the scaffold. Your job is to teach the child to use it, then get out of the way.
Start with one routine. Use it every single day. Redirect to the schedule instead of answering “what’s next?” verbally. Track your prompts. After two weeks, you’ll have real data. That data will tell you more than any article can.
Autism Victory App makes this easier to build and track
Building a visual schedule system from scratch takes time, and most families are already stretched thin. Autism Victory App brings together the tools that make this process faster and less overwhelming, without replacing the work of a good therapist or teacher.
The app includes step-by-step educational videos that walk you through building your first schedule, printable template guides you can adapt to your child’s routine, and a caregiver community where parents share what’s actually working in their homes. The AI guidance feature helps you think through which format fits your child’s current communication level, and the state-specific resource navigator can connect you to funding and support programs that may cover materials or therapy services.

If you’re just getting started, the Autism Victory App free trial gives you seven days of full access to all features, including the schedule-building resources and the caregiver support community. For Spanish-speaking families, the app is also available in Spanish. Start your free trial today and build your first visual schedule with guidance at every step.
Useful sources for further reading
AFIRM Visual Supports Brief Packet — Defines visual supports as an evidence-based practice for ages 0–22 and includes an implementation checklist with core components.
Vanderbilt Kennedy Center — Visual Supports Guidance — Practical guidance on First–Then boards, reinforcement planning, and classroom implementation.
University of New Mexico / CDD — Visual Supports for Children with ASD — Explains the cognitive rationale for visual supports and recommends personalized, low-tech approaches for getting started.
2024 Literature Review (Taylor & Francis) — Peer-reviewed review of 10 studies on visual schedules and on-task behavior; includes data on generalization, maintenance, and social validity.
Nebraska Autism Spectrum Disorders Network — Visual Schedules — University-based overview of visual schedule types, purposes, and implementation guidance for school and home settings.
PubMed Scoping Review — Visual Supports at Home and in the Community — Covers themes of predictability, anxiety reduction, and participation across home and community settings.
For individualized planning, consult your child’s IEP team, a Board Certified Behavior Analyst (BCBA), or a speech-language pathologist. General information like this article is a starting point, not a substitute for professional guidance tailored to your child’s specific needs.